Watch An ASUS ROG Ally Get Upgraded To 32GB Of DDR5-7500 RAM With A Risky Mod

For its part, the ASUS ROG Ally offers a compelling mix of high performance and a svelte form factor with attractive looks and a unique feature: a variable-refresh-rate display. One place it doesn't stand out is in its memory configuration, though; 16GB of DDR5 memory at 6400 MT/s is perfectly serviceable, but not exceptional. That might be why modders like SlickBuys are picking up their heat guns and replacing the RAM on their ROG Ally systems with LPDDR5X running at 7500 MT/s.

This is a complicated mod, and not for the faint of heart. It requires specialized tooling and also needs a steady hand. Experience with desoldering and replacing BGA components is definitely going to help when doing a mod like this. It requires disassembling the entire machine (disregarding the "DO NOT DISASSEMBLE" sticker inside) and then desoldering the four Samsung 4GB LPDDR5 chips before replacing them with 8GB LPDDR5X chips.

The video shows the entire process, including not only the disassembly and chip replacement, but also the process of desoldering the BIOS chip and flashing it with a modified firmware that supports the higher capacity and speed. Fortunately, the new LPDDR5X chips use the same voltage and have the same thermals as the original RAM, so it's a relatively straightforward hardware mod.
So, why would you bother doing this? Well, the stock 16GB of memory is just fine for almost all tasks, but recent games really want 16GB of system memory, and remember—handhelds like this use integrated graphics. That means that the built-in GPU has to share RAM with the CPU, so you're really only getting about 12 to 14GB of system RAM while 2 to 4GB is dedicated for the graphics adapter. On top of that, the two types of processors have to contend for access, so the higher transfer rate is critical.
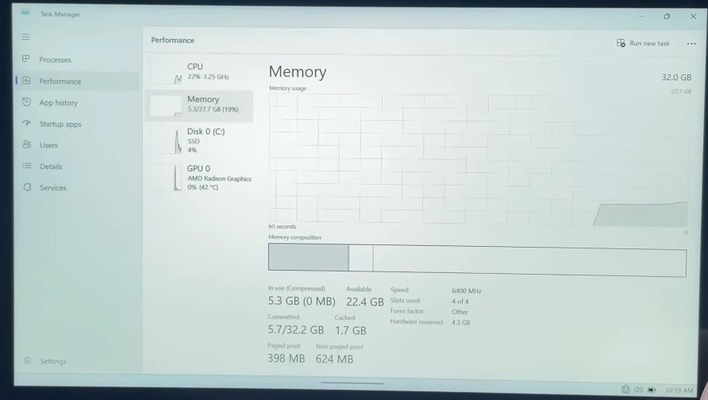
Upgrading to 32GB of memory at the higher 7500 MT/s transfer rate allows you to allocate a full 8GB of RAM to the integrated GPU while leaving 24GB of RAM for the eight Zen 4 CPU cores. This is truly more than enough memory for gaming. Some folks might think that the 8GB of video RAM is wasted on the integrated GPU, but that's not so; having the extra VRAM can allow a game to load more resources into RAM, improving texture quality and reducing loading stutters.
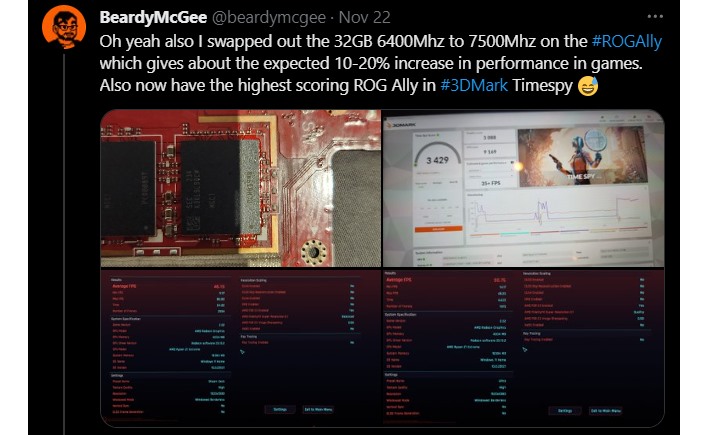
While no performance tests were shown on screen, the first person to do this mod (a Xwitter user called BeardyMcGee) says that he sees "10-20% increased" performance in games, offering up a screenshot of Cyberpunk 2077 running on Ultra settings in 1920×1080 resolution and getting 30.75 FPS average. Extremely impressive considering we're talking about a handheld device using an off-the-shelf CPU and integrated graphics.
If you'd like to do this mod yourself, make sure you have the tools and expertise to do so. You'll need the BIOS mod files that you can find here on Github, and you'll probably want to join the Discord server of the crazy folks who came up with this idea. (You can join our Discord while you're at it, too!) Alternatively, you can apparently hire SlickBuys to do the mod on your own system, although he doesn't quote a price for the service. His page to request a quote is here.