What To Do If The Windows 11 Health Check App Says Your PC Is Not Compatible

We can now say with 100 percent certainty that Windows 10 is the not the last version of Windows. Following a barrage of leaks, rumors, and speculation, Microsoft this week finally introduced the world to Windows 11, with the goal of "bringing you closer to the people and things you love." The question is, will it run on your PC? To help find out, Microsoft released a PC Health Check app to see if your setup is compatible, and in some instances it is causing some undue stress.
That's because it is telling people their PCs are not compatible with Windows 11, when all that is really needed is a simple BIOS setting adjustment.
Windows 11 Minimum Requirements
That is not the case for every PC that fails the test. There are actual minimum requirements that will leave some older PCs behind. Here's a look at the core requirements to get Windows 11 up and running when it launches later this year...
- Processor: 1GHz or faster with 2 or more cores on a 64-bit CPU or SoC
- Memory: 4GB RAM
- Storage: 64GB or larger
- Graphics Card: DirectX 12 compatible / WDDM 2.x
- Display: > 9 inches with HD resolution (720p)
- Internet: Microsoft account and internet connectivity required for setup
- TPM: Trusted Platform Module (TPM) version 2.0
There are a few other requirements, along with a long list of optional specifications to take advantage of certain specific features. The one that is tripping some people up, however, is the TPM specification. I recently purchased a Falcon Northwest Talon system similar to the one we reviewed a couple of months ago, with high-end hardware and modern amenities, and it failed the PC Health Check diagnostic. Why? Because of that pesky TPM.
TPM is added layer of security that has been around for well over decade. However, it is disabled by default on a lot of systems, mine included, and that can cause your PC to fail the Windows 11 test. And unfortunately, the PC Health Check app does not tell users exactly why their setups failed, only that "this PC doesn't meet the minimum system requirements" for Windows 11.
If you run into that message yourself and think your PC is up to snuff, then a visit to your motherboard's BIOS is in order.
How To Enable TPM In Your BIOS To Pass Microsoft's Windows 11 Compatibility Test
The exact steps are going to vary by motherboard model, including just getting into the BIOS. When booting up your PC, mash the F2 or Del key, either when prompted or repeatedly before the Windows loading screen shows up. If that does not work, you will have to consult your motherboard manual for what key to press in order to enter the BIOS.
Here's where things get tricky. Even among motherboards from the same brand, the option to enable TPM might appear different and be in different locations. For example, Ben found the option on his ASUS X570 TUF Gaming Pro motherboard by heading to Advanced > TPM Device Selection and selecting "Firmware TPM" from the pull-down menu (the default option is "Discrete TPM").
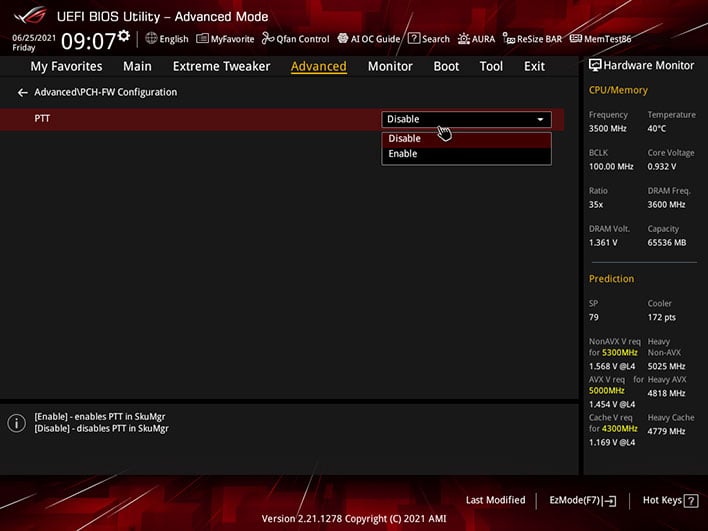
I also own an ASUS motherboard, but it is the ROG Maximus XIII Hero (Z590 platform). The option is a little more hidden and not quite as obvious, as shown in the screenshot I took above. It is still within the Advanced section, but under the Advanced\PCH-FW Configuration control, which needs to be changed from Disable to Enable.
You might see this on other Intel systems. PTT is the abbreviation for Intel's Platform Trust Technology. This basically refers to TPM technology built into compatible CPUs, rather than a dedicated chip on the motherboard (some motherboards have a header where you can install a specific TPM chip, but you really shouldn't need to if you own a relatively modern system). Intel has been including this in its processors since its 4th Gen Core "Haswell" CPUs released in 2013.
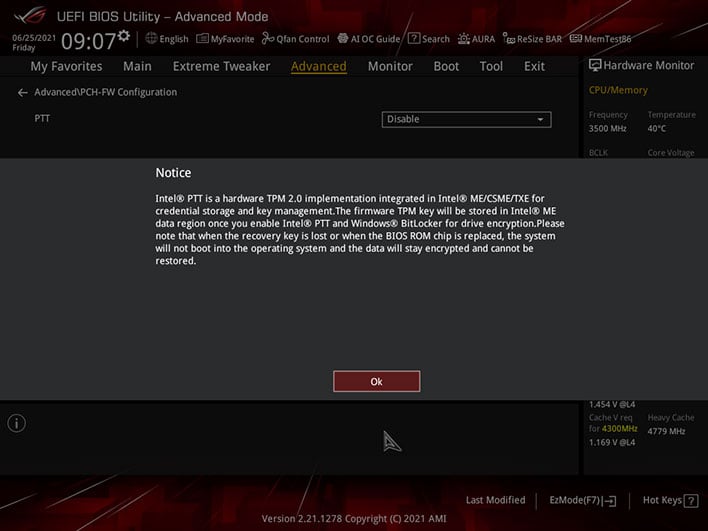
Once you attempt to make the change in the BIOS, a notice will likely appear, like the one you see above. Just click the OK button, then save your changes and boot reboot your PC.
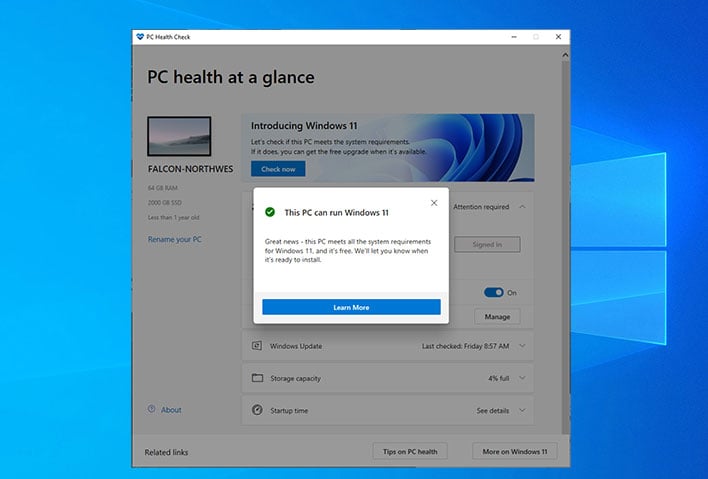
After you have made the adjustment in your BIOS and have booted back into Windows, fire up the PC Health Check app and give it another go. If the TPM requirement is what had previously caused your PC to fail the test, you should now see a more encouraging messaging saying, "This PC can run Windows 11."
If you want added peace of mind, you can type TPM.msc in the Start menu to bring up the TMP Management screen in Windows, and look at the Status section. It should say, "The TPM is ready for use" once it is enabled in your BIOS.
Now all that is left to do is wait for Windows 11 to arrive, knowing that your PC meets the requirements to install it.


