Alienware Aurora R8 Review: A Compact RTX Gaming Powerhouse
Alienware Aurora R8: Design and Build Quality
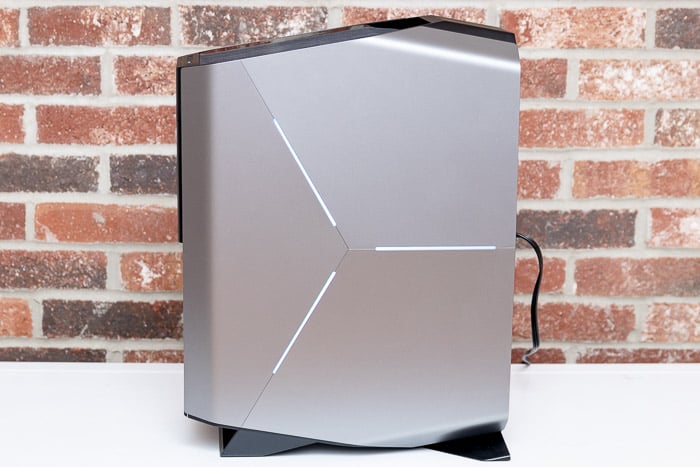
Aesthetically, the Aurora R8 carries the same styling introduced with the R5 in 2016. The exterior of the tower bears Alienware's iconic triad design. The lighting on the side panels is customizable where each individual strip and the power button can be assigned their own colors.
The Aurora R8 provides 3x USB-A 3.0 (5Gbps) ports, 1x USB-C 3.0 (5Gbps) port, as well as headphone and microphone jacks at the top front. Two of the USB-A ports are capable of charging devices when the system is off, but there's no visual indication for which ports these are -- a power plug icon or similar could help.

The rear I/O panel on the motherboard delivers 5x USB-A 2.0 ports, 3x USB-A 3.0 (5Gbps) ports, 1x USB-A 3.1 (10Gbps) port, 1x USB-C 3.1 (10Gbps) port, 1x RJ-45 Killer Ethernet jack, and audio jacks. Thunderbolt 3 is not supported. It is disappointing to no have TB3 on-board, but it is unlikely to make a difference for most gamers.
The side panel opens with a release lever in the rear. There is not much to see at first as the power supply is situated above the graphics card, covering the motherboard. Another two locks in the rear allow the power supply to swing out and reveal the CPU liquid cooler and RAM, however.
The interior of the Aurora will look familiar to anyone who has ever peered inside a Dell desktop. Alienware does not put much emphasis on the machine's internal aesthetics. Instead, it aims to make the interior as functional and user-friendly as possible. Visual instructions are provided to grant further access for component upgrades, for example.
The system is effectively separated into three chambers to divide airflow: an upper area for the processor and memory, a lower chamber for the graphics card and expansion slots, and the third is the power supply.
The upper area vents out the top via the 120mm CPU radiator. While it is a single fan configuration, the radiator is on the thicker side so heat dissipation should not be an issue.
Airflow between the upper and lower chambers is largely restricted. Instead, the upper chamber mainly intakes air through a small vent near the I/O panel.
The lower chamber, on the other hand, intakes air via a front mounted 120mm fan. Air is channeled through either the blower fan of the GeForce RTX 2080 and out the back or else out the side panel venting. This setup helps prevent heat from either the CPU or GPU from impacting performance of the other.
Finally, the power supply draws in air from the upper portion of the side vent and exhausts out the rear.
We did encounter a couple minor annoyances working inside the system, but nothing deal-breaking. The biggest issue is the tendency for the SATA power connector to come loose from the hard drive when the PSU swings out -- it also arrived loose from shipping. We recommend disconnecting the SATA power connector before swinging out the PSU to reduce the risk of damage to the hard drive.
The other is simply remembering to re-lock the PSU in place before reattaching the side panel. The system "helps" you realize this as the side panel lights do not come back on as they should if the PSU isn't locked in place. Both of these issues are really nit-picking, but are important to keep in mind when working on the system.
Every other aspect about working with the Aurora is very well designed. It is virtually tool-less to upgrade, with just a few select components requiring tools to change out -- namely the CPU cooler. Two tool-less 2.5" drive bays are provided at the bottom to add in storage with power cables pre-run. The corresponding SATA data ports are located just above these bays on the motherboard and are easy to access too.
Moving along to software...

The Aurora R8 provides 3x USB-A 3.0 (5Gbps) ports, 1x USB-C 3.0 (5Gbps) port, as well as headphone and microphone jacks at the top front. Two of the USB-A ports are capable of charging devices when the system is off, but there's no visual indication for which ports these are -- a power plug icon or similar could help.

The rear I/O panel on the motherboard delivers 5x USB-A 2.0 ports, 3x USB-A 3.0 (5Gbps) ports, 1x USB-A 3.1 (10Gbps) port, 1x USB-C 3.1 (10Gbps) port, 1x RJ-45 Killer Ethernet jack, and audio jacks. Thunderbolt 3 is not supported. It is disappointing to no have TB3 on-board, but it is unlikely to make a difference for most gamers.

The side panel opens with a release lever in the rear. There is not much to see at first as the power supply is situated above the graphics card, covering the motherboard. Another two locks in the rear allow the power supply to swing out and reveal the CPU liquid cooler and RAM, however.

The interior of the Aurora will look familiar to anyone who has ever peered inside a Dell desktop. Alienware does not put much emphasis on the machine's internal aesthetics. Instead, it aims to make the interior as functional and user-friendly as possible. Visual instructions are provided to grant further access for component upgrades, for example.

The system is effectively separated into three chambers to divide airflow: an upper area for the processor and memory, a lower chamber for the graphics card and expansion slots, and the third is the power supply.

The upper area vents out the top via the 120mm CPU radiator. While it is a single fan configuration, the radiator is on the thicker side so heat dissipation should not be an issue.

Airflow between the upper and lower chambers is largely restricted. Instead, the upper chamber mainly intakes air through a small vent near the I/O panel.

The lower chamber, on the other hand, intakes air via a front mounted 120mm fan. Air is channeled through either the blower fan of the GeForce RTX 2080 and out the back or else out the side panel venting. This setup helps prevent heat from either the CPU or GPU from impacting performance of the other.

Finally, the power supply draws in air from the upper portion of the side vent and exhausts out the rear.

We did encounter a couple minor annoyances working inside the system, but nothing deal-breaking. The biggest issue is the tendency for the SATA power connector to come loose from the hard drive when the PSU swings out -- it also arrived loose from shipping. We recommend disconnecting the SATA power connector before swinging out the PSU to reduce the risk of damage to the hard drive.

The other is simply remembering to re-lock the PSU in place before reattaching the side panel. The system "helps" you realize this as the side panel lights do not come back on as they should if the PSU isn't locked in place. Both of these issues are really nit-picking, but are important to keep in mind when working on the system.

Every other aspect about working with the Aurora is very well designed. It is virtually tool-less to upgrade, with just a few select components requiring tools to change out -- namely the CPU cooler. Two tool-less 2.5" drive bays are provided at the bottom to add in storage with power cables pre-run. The corresponding SATA data ports are located just above these bays on the motherboard and are easy to access too.
Moving along to software...


