Apple TV Wireless HD Media Streamer Review
User Interface & Quality
The Apple TV’s main screen features five sections: Movies, TV Shows, Internet, Computers, and Settings. Whenever your scroll across these section headings, thumbnails of featured content from the highlighted section is displayed at the top of the screen. At any time you can scroll up to this row of thumbnails to select one of the displayed media sources.
;)
The Movies section is where you select movie rentals, which start at $2.99 for SD titles and $3.99 for HD titles. You can browse the “Top Movies” or see movies by “Genre.” You can also “Search” for a specific movie title as well—this is an area where using an iPhone/iPad/iPod touch with the Remote app’s QWERTY keyboard really comes in handy. If you have a speedy Internet connection, once you authorize payment, you’ll be able to start watching the movie in about one minute or so. Once you start watching, you can stop, resume, start over, and watch the movie as many times as you like over the next 24 hours. You don’t have to watch the movie right away, however. If all you do is authorize the rental purchase, but don’t start watching it yet, it remains available for the next 30 days. But remember, as soon as you press play, the 24 hour clock starts ticking. The Movies section also has an “In Theaters” option, where you can watch previews of movies that are playing right now in the movie theaters.
;)
When you select a rental title, a new screen opens that shows the movie poster, description of the movie, details (such as when it was released and the running time), average user rating, average Rotten Tomatoes rating, main actors, director, and producers. Available selections are “Preview,” “Rent,” “Wish List,” and “More.” The More selection brings you to a screen where you can see some of the Rotten Tomatoes reviews and customer reviews, as well other available iTunes Store movie rentals that feature the actors, director, producers, and screenwriter.
;)
We were very impressed with the video quality of the HD movie rentals. We would compare it to the quality you would expect from a DVD movie or better. Your options while watching a movie rental are play, pause, fast-forward, rewind, and return to the menu. You fast-forward and rewind by pressing the left or right arrow buttons on the remote. There are three different fast-forward and rewind speeds. When you pause, fast-forward, or rewind, a progress bar appears at the bottom of the screen. If you leave a movie and then return to it later, you have the choice of resuming where you left off or starting over again from the beginning. Note that none of the Apple TV controls let you adjust volume—that has to be done directly on your TV or audio equipment.
;)
TV Shows works very similar to Movies. There are no Rotten Tomatoes reviews here, but you can pick individual episodes from multiple seasons. TV rentals start at $0.99 and you have a 48-hour window in which you can watch a TV show rental, once you press the play button. In order to rent movies or TV shows, you’ll need an iTunes account with a valid credit card associated with it. Another way that this iteration of the Apple TV differs from the previous generation is that this version can only rent movies and TV shows; whereas the previous version of the Apple TV allowed you to purchase movies and TV shows directly from the Apple TV device. You can still watch content on the Apple TV that you purchased from the iTunes Store, but you'll need to first make the purchase and download from a computer.
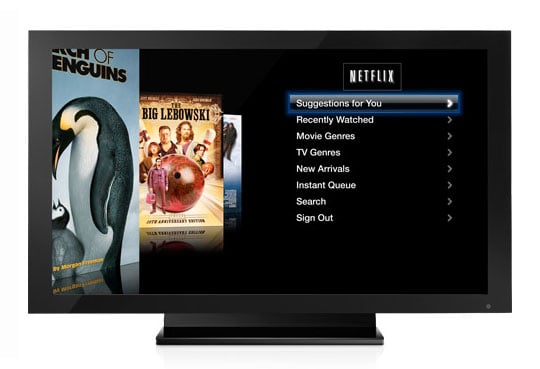
The Internet section includes options for watching streaming Netflix movies, YouTube videos, playing podcasts, accessing media saved in your MobileMe account (if you have one), viewing photos on Flickr, and listening to Internet radio stations. You obviously need a Netflix account in order to watch Netflix streaming movies. If you’re used to navigating available Netflix streaming options with Roku, you’re going to be in for a surprise, as the Apple TV uses it own unique interface for Netflix, which is very similar to how you interact with the Apple TV's movie and TV show rentals. The same can be said for the YouTube interface—once you get accustomed to navigating the Apple TV menus, you’ll find it pretty seamless to interact with virtually all of the content options.
As to Podcasts, you can play audio and video podcasts, but you cannot subscribe to them, like you can in iTunes on a computer or on an iPhone/iPad/iPod touch. To see Flickr content you either add a Flickr contact or enter a search term. There are scads of Internet radio stations to choose from in a wide variety of genres.
;)
The Computers section is where you can access media that is stored on your computer. In order to access this content, your computer must be on and iTunes needs to be running. You also have to configure iTunes for Home Sharing, which requires an iTunes account. You can access Music, Movies, TV Shows, Podcasts, and iTunes U content that are in your computer’s iTunes Library. Note that even though the media you want to access may be saved on your computer’s hard drive, Apple TV can’t see it unless it’s also in your computer’s iTunes Library. You also can't stream content to the Apple TV from a media server, unless that server is capable of running iTunes 10 (which is needed for Home Sharing); this means that if you house your media library on a NAS device, Apple TV won't be able to access it.
Apple TV is also somewhat limited in terms of what file formats and codecs it supports. So if you have media you want to access that Apple TV doesn’t support (see the specs on the first page of this review), you’re going to have to re-encode it to a format that the Apple TV does support. The Photos option let’s you view photos that are saved in your computer’s iPhoto Library. Note that if you have an especially large iPhoto Library, it can take a while for Apple TV to display the full contents of the library. You can view individual photos or see them displayed as a slideshow, with plenty of options for how the slideshow looks.
Speaking of which, Settings is the final section on Apple TV’s main screen. Here you can do things like give the Apple TV a unique network name, set up DHCP or assign a static IP address, set parental controls, check for firmware updates, set the device's sleep timer, and reset the device.
In addition to streaming media from your computer to the Apple TV, soon you’ll also be able to stream media directly from your iPhone/iPad/iPod touch to the Apple TV using Apple’s AirPlay technology. There’s no word on when exactly AirPlay will come to iPhone/iPad/iPod devices, but the rumor mill is hinting strongly that we’ll see it in the iOS 4.2 update, which is speculated to become available as early as the second week of November.


