MSI P45 Platinum and Diamond Motherboards
MSI P45 Platinum Layout
![]()
MSI P45 Platinum
We're big "fans" of this cooler...
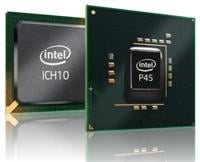
The P45 Platinum supports Core 2 Duo / Quad / Extreme CPUs with up to an unofficial 1600 MHz front side bus. It also supports up to 16GB of DDR2 memory, running as high as 1200 MHz (overclocked). While 32-bit OS users won't benefit from the extra memory, 64-bit users should be able to see some benefits from this added feature. Unlike the higher-end X48 chipset, the P45s comes with a brand new Southbridge, the Intel ICH10/R.
A small copper heatsink is placed over the Southbridge with a MSI-branded plate on top that blocks the ridges of the heatsink, possibly slightly hindering heat dissipation as a result. Two heatpipes lead away from here towards the Circu-Pipe 2 structure in the middle of the board, near the Northbridge. Three other pipes also join here, running from heatsinks placed around the CPU sockets, although the one marked with DrMOS also receives some extra cooling via an opening in the I/O shield at the back. A large copper block sits directly on top of the Northbridge, transferring heat away from the chip and into the pipes as well. Like a work of art, the copper pipes arc upward and outward culminating in a five-bladed fan. The 8-pin power connector lies up in the corner closest to the CPU socket, tucked in up and around the heatpipes. This location may not cause an issue for most people, but we found it a bit hard to reach when the P45 Platinum was installed in one of our Antec cases, which mount the PSU at the bottom of the chassis. DDR2 slots are finally(!) color-coded with channels in mind; green for channel 0 and orange for channel 1. Along the front edge are the 24-pin ATX power and floppy drive connectors, as well as front angled yellow IDE port and six purple SATA ports. Nearly hidden here was a connector for the GreenPower Genie - a three-pin connector for monitoring power efficiency. Two more SATA ports in blue sit perpendicular to the board, controlled by the JMicron JMB363 controller, which also supports the IDE and eSATA as well. USB, TPM (Trusted Platform Module), front panel, and IEEE-1394 headers are all easily accessible along the left-modt edge of the board, most of which can be used with the M-Connectors for quick setup. Two PCI-E x16 slots, colored in blue, can be used in CrossFire setups although on the P45 chipset these slots will shift down to 8 lanes each instead of the full 16 lanes found in the high-end X48 boards. The slots are placed far enough apart that the cooling of each card should not be comprimised. There also are two each of PCI and PCI-E x1 slots providing for further expansion needs. These slots may be lost, however, due to the width of certain graphic cards, especially when there are two cards installed. Ample fan connectors allow for the setup of proper airflow within a chassis. Two are in the middle, two towards the front, and two more are found by the DIMM slots, one of which is for the CPU cooler. Retention clips found on the DIMM slots are very close to the PCI-E X16 slot, which may conflict with larger graphics cards, such as the 9800 GTX. Rear I/O options include color-coded PS/2 ports for mouse and keyboard, six USB 2.0 ports, IEEE-1394, S/PDIF audio, eSATA, a Clear CMOS button, LAN jack, and six audio jacks. Not shown in the pics, but obvious when the system is powered, LEDs are placed throughout the board, a few of which are used for diagnosing operational issues. This new system replaces the LED brackets that MSI has long used in the past. Power and reset buttons are also found on the board, but thet are not labeled as clearly as those on let's say one of ASUS' Republic of Gamers boards, and can easily be mistaken for each other. Finally, overclock jumpers can be used in an old-school way to increase the FSB in order to overclock the CPU. It's an odd step backward that we never really looked at when making our own attempts at overclocking. We preferred to control everything through the fully-featured Cell Menu within the BIOS.
;)
;)
;)
;)
;)
;)
;)
;)
;)
;)
;)
;)
;)
;)
;)
;)


