NVIDIA SHIELD Tablet Powered In-Car Infotainment System DIY Project Guide
Stereo Upgrades And Connecting It All Together
Connecting It All Together
This is where the tablet install got overly complicated -- I want to get digital audio from the tablet because I don’t want to use an amplified headphone output. The NVIDIA Shield Tablet supports USB OTG Y-cables that theoretically let you charge and connect USB peripherals, like a DAC, at the same time, but other complications arose.When using a USB OTG Y-cable on any Android device, you cannot use power on/off as a trigger for tasks. The device will not detect power again unless you physically remove the Y-cable from the device and reinsert it. This wouldn't be a problem if you have the tablet installed where you can remove the cable easily, but I wasn't that fortunate.
Theoretically, if someone created a USB OTG adapter with a power switch to the data and power wires, I could rig it to work with a relay, but such a device does not exist yet. This wasn't a problem for Nexus 7 installs because it supported wireless charging and had pogo pins for alternative methods of charging when using an OTG cable.
I could use Bluetooth audio as an easy solution, but the NVIDIA Shield Tablet's Bluetooth audio support isn't the best. There's always random pops and stuttering, which got better with Nougat, but they are still noticeable and not ideal.
Luckily, the NVIDIA Shield Tablet has a mini-HDMI port that provides an alternative method of getting digital audio out. I found a micro-USB powered HDMI audio extractor that converts HDMI audio to optical S/PDIF. It's not 24-bit/192 KHz but 16-bit/44 KHz, is still better than Bluetooth.
Powering And Charging It All
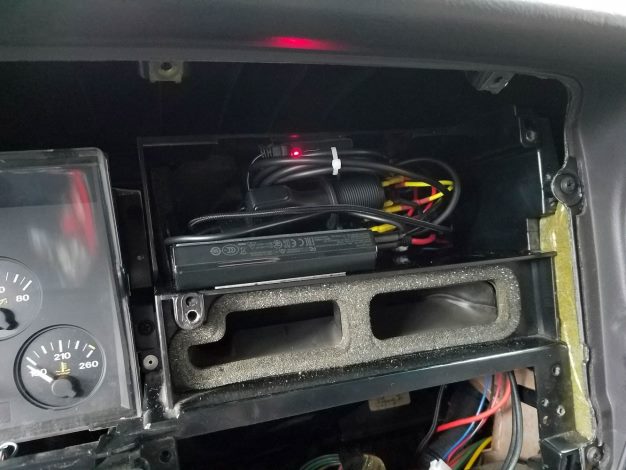
Powering the NVIDIA Shield Tablet is the easiest part. I used a factory harness adapter to create a plug-and-play wiring solution. The wiring harness has a cigarette lighter socket wired to a 12-volt relay that turns on with ignition power. An Aukey 4-port car charger with Quick Charge 3.0 (CC-T9) plugs into the socket and provides power to the tablet and other devices. I routed the Quick Charge 3.0 port through the ashtray to charge my phone as needed.Hard-wired micro USB chargers are available, but I've had bad luck with a 2.1-amp unit from Amazon – the micro USB connector broke off. So I decided to go with a solution that has removable cables should they ever need to be replaced.
The DAC
I got my start in hardware reviews with PC audio, so as a geeky throwback to my roots, I'm using a Creative Labs Sound Blaster E5 here. The DAC sports a high-end Cirrus Logic CS4398 digital-to-analog converter chip with a 120dB signal-to-noise ratio.It's also powered by micro USB, has a mini-optical S/PDIF input, and analog line output. There's an Android companion app that lets you change and configure audio settings, too.
In-Car Stereo Upgrades
Car speakers must withstand extreme heat and cold climates, but after 10 to 20 years, the paper cones deteriorate and they're essentially useless. The speakers in my Jeep were replaced a decade ago with Infinity Reference and Alpine Type S coaxials. They were in bad shape, however. The Infinity Reference coaxials in the front doors had cracked cones and the Alpine Type S voice coils were burnt out and in dire need of replacement.I eyed the Clarion Full Digital Sound (FDS) system initially, which would've allowed a direct connection to the tablet via USB with 1.5-amp charging, but at $3,000 for a complete system, it’s a bit extreme for my old Jeep. I would've had zero problems spending $2000 on a sound system in my younger days, but it's not a high priority expense now that I have a family.
Luckily, you can get a good sound system for very little money nowadays. I tapped Clarion for a complete budget system consisting of SRG1623S components, SRG1623R coaxials, and a WF2520 shallow-mount subwoofer.
The SRG1623S component speakers employ a single capacitor crossover to protect the tweeter from low-range frequencies. It lacks an elaborate crossover network, but simplifies installation greatly. I used all factory wiring for the mid-range speakers in the doors and tweeters in the dash. I modified the stock tweeter mounts to accommodate the new Clarion tweeters, too.
The Jeep didn't come with a factory subwoofer, but Q Logic makes a Q Customs enclosure that mounts to the rear interior quarter panel for a factory look. Since the factory cargo cubby netting was broken on my Jeep anyway, I didn't lose anything but a little bit of cargo space. Q Logic makes Q Customs for a lot of popular cars and trucks – you can get better sound quality out of a rectangular box with the right air space, but the Q Customs is easy to install, looks good and doesn't sacrifice too much trunk space.
An XC2510 5-channel compact amplifier drives everything with 50-watts a channel to the speakers and 200-watts to the subwoofer. It won't wake the neighborhood but provides good clean audio and occupies very little space.
An EQS-755 equalizer takes the 2-channel output of the Sound Blaster E5 and sends 6-channels of 8-volt outputs to the amp. The EQ provides a dedicated volume knob, subwoofer adjustment, fader and physical EQ adjustments as well.
Overall, the speakers, amp, and EQ should cost around $500 online, which is very reasonable for a complete sound system. The front and rear speakers alone run under $150 and are a good upgrade if you're still running stock speakers.


