Alienware Alpha R2 Review: Big Screen Gaming In A Little Package
Opening Up The Alpha R2
Part of the overall price tag for an Alpha R2 is because of the engineering effort involved in designing a relatively powerful PC in such a small chassis. And sure, you could build yourself a better spec'd system for the same cost as the model reviewed here, but it wouldn't be anywhere near as compact. However, as small as it is, Alienware designed the Alpha R2 so that it's easy to service the main parts.
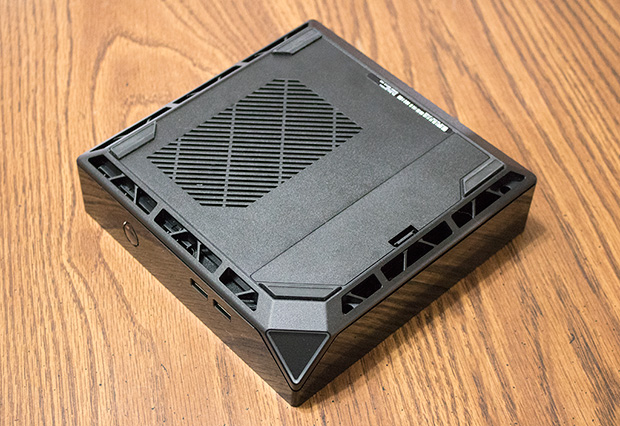

Flipping the Alpha R2 over, you'll notice a large vent. Air is not actively pushed through the bottom vent like it is with the two side vents, it's just there to let the system breath. That means you can stack the Alpha R2 on another component if you're short on space and not have to worry about it blowing hot air on top of it, just make sure the component you're stacking on isn't itself vented on top and doesn't heat up when in use.


There's a door on the bottom of the Alpha R2 that pops off with little effort—simply push in the tab and lift away. Once removed, you'll have access to a hidden USB 2.0 port. Can you guess what it's for? If you guessed a wireless dongle, award yourself 500 geek points. This is an ingenious implementation by Alienware, as it allows you connect wireless devices such as keyboard and mice to the Alpha R2 without an unsightly dongle sticking out of the side. For maximum effect, invest in a wireless dongle that supports more than one simultaneous connection. That way you can connect a wireless mouse and keyboard without using up any of the four USB 3.0 ports.

To get inside the Alpha R2, you have to remove four screws, one in each corner. These can a bit challenging to reach because they sit so far down and, at least in our case, were screwed in pretty tight. It took a bit of effort to remove three of the screws with a precision screwdriver, and for the fourth one we had to turn to a bigger screwdriver with a narrow shaft.
Once unscrewed, the bottom panel lifts off with just a little prying. Inside you'll find the storage bay. Two of the four screw holes on the side of the drive bay had screws in place, plus there's another holding the lip of the storage carriage in place. To access the HDD (or SSD), remove these and push the drive bay back.
Once unscrewed, the bottom panel lifts off with just a little prying. Inside you'll find the storage bay. Two of the four screw holes on the side of the drive bay had screws in place, plus there's another holding the lip of the storage carriage in place. To access the HDD (or SSD), remove these and push the drive bay back.

If you flip the Alpha R2 over, the other half of the chassis lifts up and away, revealing the rest of the guts. The two large blowers mentioned earlier dominate the interior. A pair of plastic clips holds each one in place, all you have to do is squeeze on both sides and lift up on the blowers.

Once you've removed the blowers, you can access the single stick of RAM inside the Alpha R2, along with the wireless card and aluminum heatsinks for the CPU and GPU, which are held in place with screws. Despite the tiny interior, it's laid out in a manner that doesn't feel cramped like some SFF systems do.


