Dell XPS 630 Gaming Desktop System
Test Systems and BIOS Offerings

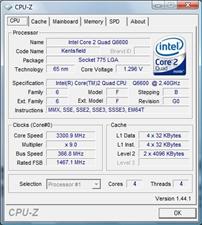
How we configured our test systems: When configuring the Dell XPS 630 for this article, we wanted to keep the settings as close to the way Dell would ship a system to a customer as possible. Therefore, we left all settings at their defaults other than the memory timings used for a pair of Corsair Dominator DDR2-800 DIMMS, which we manually set to 4-4-4-12 timings. As the operating system, utilities, and drivers also come pre-installed, we had little other choice but to install a couple of Vista hotfixes regarding gaming in general and GeForce cards in particular. Our complete suite of benchmarks was then installed, the hard drive was defragmented, and we re-booted and let the system come to idle before launching any of our applications. We used a set of numbers from a 2.33GHz Core 2 Duo based system that we reviewed earlier as our zero-point basis for comparison. Although the XPS 630 we tested came installed with a Core 2 Quad Q6600, the base model ships with one of the newer Core 2 Duo E8200 processors, rated at 2.66GHz, whose numbers should be a bit closer.
|
|
Reference System: Asus Striker II Formula
Windows Vista Ultimate |
Dell XPS 630: GeForce 8800 GT Seagate Barracuda 7200.9 Windows Vista Home Premium |
|
One usually doesn't expect much in the way of tweaking when it comes to a BIOS used on pre-configured system. Options are usually quite tame, amounting to not much more than defining boot order or enabling system components. At first glance the Phoenix-Award BIOS used on the XPS 630 figures to be the same, with section headings of Main, Advanced, Security, Power, Boot, and Exit. However, the Advanced section, like Optimus Prime, has more than meets the eye.
Although typically frowned upon officially by the big manufacturers, this BIOS has two areas clearly labeled as Overclock Configuration and Overvoltage Configuration. Now, we're not going to go ahead and state that the options here rival a true PC enthusiast board, but it's a pretty good start and has just enough options to get your feet wet. To start, one needs to switch off the FSB - Memory Clock Mode, which allows the FSB and memory clocked to be linked, or unlinked, and the speeds dialed in directly. Memory timings can also be tweaked here as well. Switching over to Expert mode allowed us to input our timings directly when using a pair of Corsair Dominator DIMMs. No overclocking attempt would be complete without some power over the voltages, and while available, the choices are a bit limited:
| CPU Core: CPU FSB: Memory Voltage: Chipset Voltage: |
1.00V-1.85V (0.05V steps) 1.20V-1.40V (0.05V steps) 1.80V-2.50V (0.05V steps) 1.20V-1.50V (0.05V steps) |
Oddly, the CPU Range of Voltage starts from high to low, while the other three start at AUTO and then move up from there.


