NVIDIA GeForce 3D Vision Glasses
Installation and Examination

Installing and using the GeForce 3D Vision glasses is very easy. Assuming you've got a compatible GeForce graphics card and monitor, the process requires connecting the base / IR emitter to a PC, installing the necessary drivers (which are integrated into NVIDIA's GeForce drivers), and running through a setup wizard.
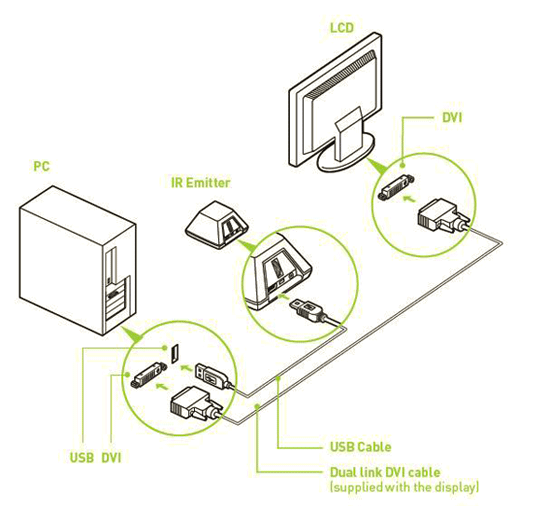
There is nothing out of the ordinary to consider when connecting the base to a PC, other than to ensure the base has a clear line-of-sight to the glasses. The infrared signal emitted from the base needs to be picked up by a receiver in the glasses to keep everything in sync.
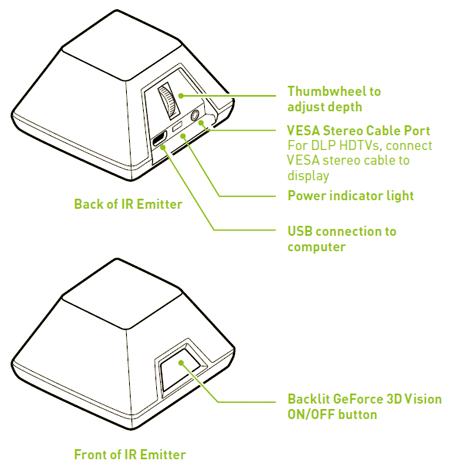
As we've mentioned, the base itself has a thumbwheel on its backside that's used for real-time adjustment of the 3D depth effect. There is also a power indicator light, USB connector, and a VESA stereo cable port on the back. On the front of the emitter, there's an On / Off button that's backlit and shows whether or not stereoscopic 3D has been enabled. An NVIDIA logo on the button glows bright green when 3D is enabled and a dim green when it is not.
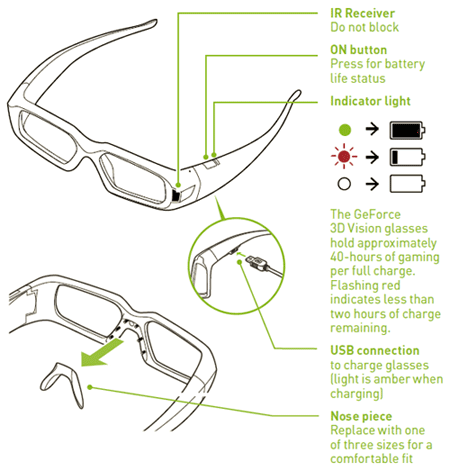
The glasses are fairly streamlined with only a power / charge indicator LED and power button on one side and a USB charging port on the other. At the front edge of the glasses is a tiny IR receiver, which again is used to sync with the base / system. And the interchangeable nose-guards snap right on and off the glasses.
;)
;)


