How To Overclock Raspberry Pi 4 Over 2GHz For A Tasty Speed Bump
Getting Your Raspberry Pi 4 Overclocked And Ready To Rock
Preparing The Raspberry Pi 4 For OC Action
If you're interested in overclocking your Raspberry Pi 4, you'll need to get comfortable with the Linux command line and have an SD card with the latest version of Raspbian Buster which, as of this publication, is the build released on September 26, 2019. It's free to download from the Raspberry Pi Foundation, and installation is as simple as plugging an SD card into your PC and flashing the Raspbian image using an image writer like Etcher. After that, pop the SD card into your Pi and you're set. It takes around 15 minutes to walk through the setup screens, and the system will reboot, and then you're good to go.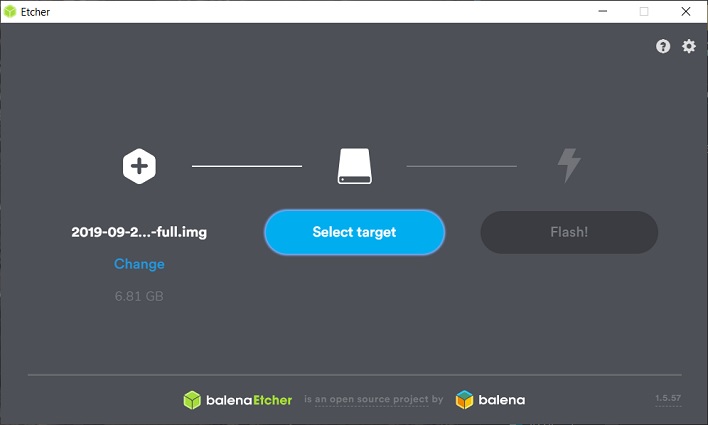
Very little effort required to get Linux on Raspberry Pi 4.
If you have an existing installation, you'll need to run a pair of commands in a Terminal window to update everything to the latest. It's not a bad idea to do this with a fresh install, but as of this writing, the September 26th release is current. These commands should be familiar to Linux users:
sudo apt update
sudo apt dist-upgrade
Updating the Raspberry Pi 4's Firmware
Once your system is up to date, there's one more command to run, which will update the firmware on your tiny computer. If you've never updated the firmware on your Raspberry Pi 4 before, you should. An earlier firmware update reduced power consumption of the USB controller from which the Pi draws its power, which had the effect of reducing the nominal operating temperature. Once your system is updated, run this command from your Terminal window.sudo rpi-update

Updating firmware is no more difficult than a BIOS update.
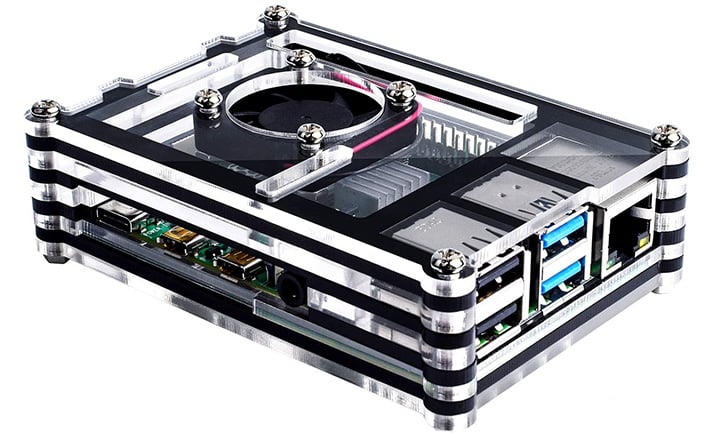
This will download around 100 MB worth of files including the firmware and a flasher. The update process is entirely automatic, but you'll need to restart the system again for the firmware to load on the next boot. Once that's done, it's time to overclock. A passive heatsink is an absolute must for any Raspberry Pi system, but we also recommend using a case with a fan. Overclocking any PC will generate additional heat, and the Pi family is no exception to the laws of physics. Here's a good option we found on Amazon that comes with heat sinks and a power adapter as well...
How to Overclock A Raspberry Pi System
The overclocking process is as simple as editing a file from either the Linux command line or Notepad on your PC. If you choose to put the SD card back into your PC, don't format the card when Windows complains that it can't read the file; doing so will wipe your system partition and then you get to start over with Etcher. On Windows, just find config.txt on the root of the FAT32 partition that appears in Explorer and open it up. Here, you'll find a [pi4] section of the document where you can specify three parameters, which can be found in the official Overclocking Options documentation from the Raspberry Pi Foundation.The over_voltage value lets you specify the number of additional voltage steppings to feed the SoC in increments of 0.025 volts. For our purposes, 6 was as good as it got, adding an additional 0.15 volts. The default voltage of the system is 1.25 v so this represents a 12% increase. Going beyond 6 will trip a warranty flag on the device, voiding your warranty. We voided our Pi 4's warranty in the name of science and testing, but it was all for naught. Then you can directly set the CPU speed with arm_freq and the GPU clock with gpu_freq with numbers expressed in megahertz. Our final settings looked like this.
over_voltage=6
arm_freq=2140
gpu_freq=750

Our first attempt at overclocking the Raspberry Pi 4 was too aggressive and unsuccessful.
Settings the over_voltage on our system to 8 would not let it boot successfully at 2150, so 2.14 GHz was all our system could handle, but that's an increase of 42%, so that's pretty great. Fortunately, it wasn't a matter of stability vs instability, but a matter of whether the system boots or presents an eternally black screen. Once we got back to the desktop, it was time to run some tests.
Benchmarking With Raspbian And An Overclocked Raspberry Pi 4
Unfortunately we didn't have many options to choose from, but we found an unofficial Geekbench 2 build from 2012 on the Geekbench support forums. You can check out our results in the Geekbench database. At the stock 1.5 GHz, our Raspberry Pi 4 scored 4845 (Geekbench result link), compared to 6620 at 2.14 GHz (result link). These results represent a 36% improvement, which means Geekbench 2 scaled pretty well with clock speed. Those results are fairly decent for an ARM system, but are a far cry from full-fledged desktop CPU of course—an Ivy Bridge Core i7-3820QM MacBook Pro scored nearly twice that by Geekbench's own test results.
Geekbench testing required a command prompt
Web benchmarks are readily available, too, of course. To get a feel for browser performance, we ran BrowserBench's Speedometer 2, which tests real-world examples of web apps built with all kinds of JavaScript frameworks from Angular to Vue. In our recent laptop reviews, 8th-generation Core i7-8665U systems like Lenovo's ThinkPad X1 Carbon and HP's Zbook 14u G6 scored north of 100 runs per minute in Speedometer. At the default 1.5 GHz our Raspberry Pi 4 scored a sluggish 17.32, and our overclocked setup achieved a 26% gain of 21.85 runs per minute. It's certainly not going to set the world on fire, but it's a relative gauge.
On the other hand, it's also quite a bit slower than many current phones. For example, our Samsung Galaxy S10 Plus nearly tripled up on the overclocked Pi 4, scoring 61.5 with the latest version of Chrome. This is probably partially due to the fact that Raspbian relies on an unofficial build of Chromium which may not be optimized for the hardware. However, the result is most likely due to the system's BCM2711 SoC, which relies on four Cortex A72 cores that typically don't score as well clock-for-clock as the Kryo 485 cores in the Snapdragon 855. The Pi had much more in common with a Motorola G6's Snapdragon 630, which put up a score of 16.4.

Despite the low score, browsing
Fortunately, it's not just Raspbian that benefits from this firmware update. The same configuration settings are available in Lakka by editing the same config.txt file, and you can get similar improvements out of the system that way. While we found in earlier testing that performance is just fine in most systems (including Dreamcast games), newer consoles like the PlayStation Portable and Saturn stand to gain some performance from this process. Not only does the CPU support overclocking, but a 150 MHz bump to the GPU also helped us gain a few extra frames per second in 3D games on those systems. Several PSP games ran at a full 60 frames per second, including Grand Theft Auto - Liberty City Stories at double the PSP's original 480x272 resolution on both the vertical and horizontal axes. Playing those portable games at with four times the pixels at 960x544 added a ton of clarity to 3D games in an an otherwise-pixellated play field, but it may expose seams in 2D sprites or otherwise not look great with simpler games.


