Streacom DB-4 Silent Kaby Lake Media PC Build: The Sound Of Silence
Streacom DB-4: Build Part II
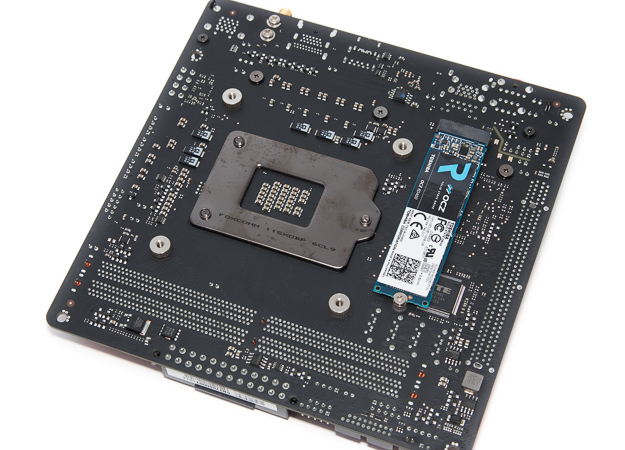
Before mounting the motherboard on the tray we will install the M.2 drive on the underside of the board and also place in the four M3 nuts which will keep our CPU cooler in place.
Place the motherboard back upright and install the CPU.

Apply a small amount of thermal paste (about the size of an uncooked grain of rice), and then gently place the copper CPU block on top.
Apply a larger amount of thermal paste on top of the copper block, then place the aluminum CPU mount with copper heatpipes included over it - being very careful with alignment. The copper heatpipes will extend towards the top of the board so as not to interfere with the I/O panel, RAM, or PCI slots.
Secure the CPU mount with the four spring loaded screws. Be sure to affix opposite corners together loosely at first and then evenly tighten the cooler.
We can now mount the motherboard to its tray which uses the four standard mITX screw locations.
Our Geil RGB RAM takes a little more work than the usual slot-it-and-forget-it install. Once in place, we can either wire the RAM to a standard fan header with colors controlled by the sliding switch or else connect it to an RGB(W) LED header to be controlled by system software. Since our Gigabyte Z270N supports the latter, that’s what we will go with. This RAM does not have a White lead so we only need to worry about the 12V and Red, Green, Blue pins.
Back to the DB-4...

Place the motherboard back upright and install the CPU.

Apply a small amount of thermal paste (about the size of an uncooked grain of rice), and then gently place the copper CPU block on top.

Apply a larger amount of thermal paste on top of the copper block, then place the aluminum CPU mount with copper heatpipes included over it - being very careful with alignment. The copper heatpipes will extend towards the top of the board so as not to interfere with the I/O panel, RAM, or PCI slots.

Secure the CPU mount with the four spring loaded screws. Be sure to affix opposite corners together loosely at first and then evenly tighten the cooler.

We can now mount the motherboard to its tray which uses the four standard mITX screw locations.

Our Geil RGB RAM takes a little more work than the usual slot-it-and-forget-it install. Once in place, we can either wire the RAM to a standard fan header with colors controlled by the sliding switch or else connect it to an RGB(W) LED header to be controlled by system software. Since our Gigabyte Z270N supports the latter, that’s what we will go with. This RAM does not have a White lead so we only need to worry about the 12V and Red, Green, Blue pins.

Back to the DB-4...


